Chair Rail Corner Cuts - How Do I Finish The Open End Of A Chair Rail Home Improvement Stack Exchange / I first rip 5/4 cherry stock to rough width on the bandsaw.. Watch as the #verycoolguys of construction show you how to install chair rail, in a proper molding installation.today we show you, step by step, how to insta. Chair rail is a type of profiled molding often used as a type of border or trim above the stairs or at the top of wainscoting that runs up stairs. This is the safest way to rip rough sawn lumber. This is the finished look of the chair rail after caulking along the top, bottom and corners. The 45 degree cut on the return will abut the chair rail, and the 90 degree cut will sit flush with the wall (or in this case, the side of my bookcase.
Measure and cut any miters for the chair rail, especially if you are turning any corners that are not 90º. The cuts will be the same. If you have existing floor board in the room snap a picture of the corners to help you visualize how the cuts should look on your chair rail. For base shoe & chair rail corner blocks call for pricing. Simple lines create a dramatic look when used to create wall panels in a living room, dining room or family room.
How To Add Chair Rail Picture Frame Molding The Diy Playbook from thediyplaybook.com Flip the chair rail over and measure using the length you found in step 1. If one is mitering inside corners the lengths of the moulding must be perfect but with a cope a slightly long length can be snapped in rather than. In a house than outside corners so there are fewer angles to do anything with except dropping the saw into a detent and cut. This also shows end grain. The corners were cut using a miter saw at 45 degrees. The preassembled inside and outside corner pieces simplify the installation. Colonial trim moulding is a small moulding with big impact. Place the chair rail along the wall and pencil mark where the outside corner should be mitered.
Ripping cherry to rough width.
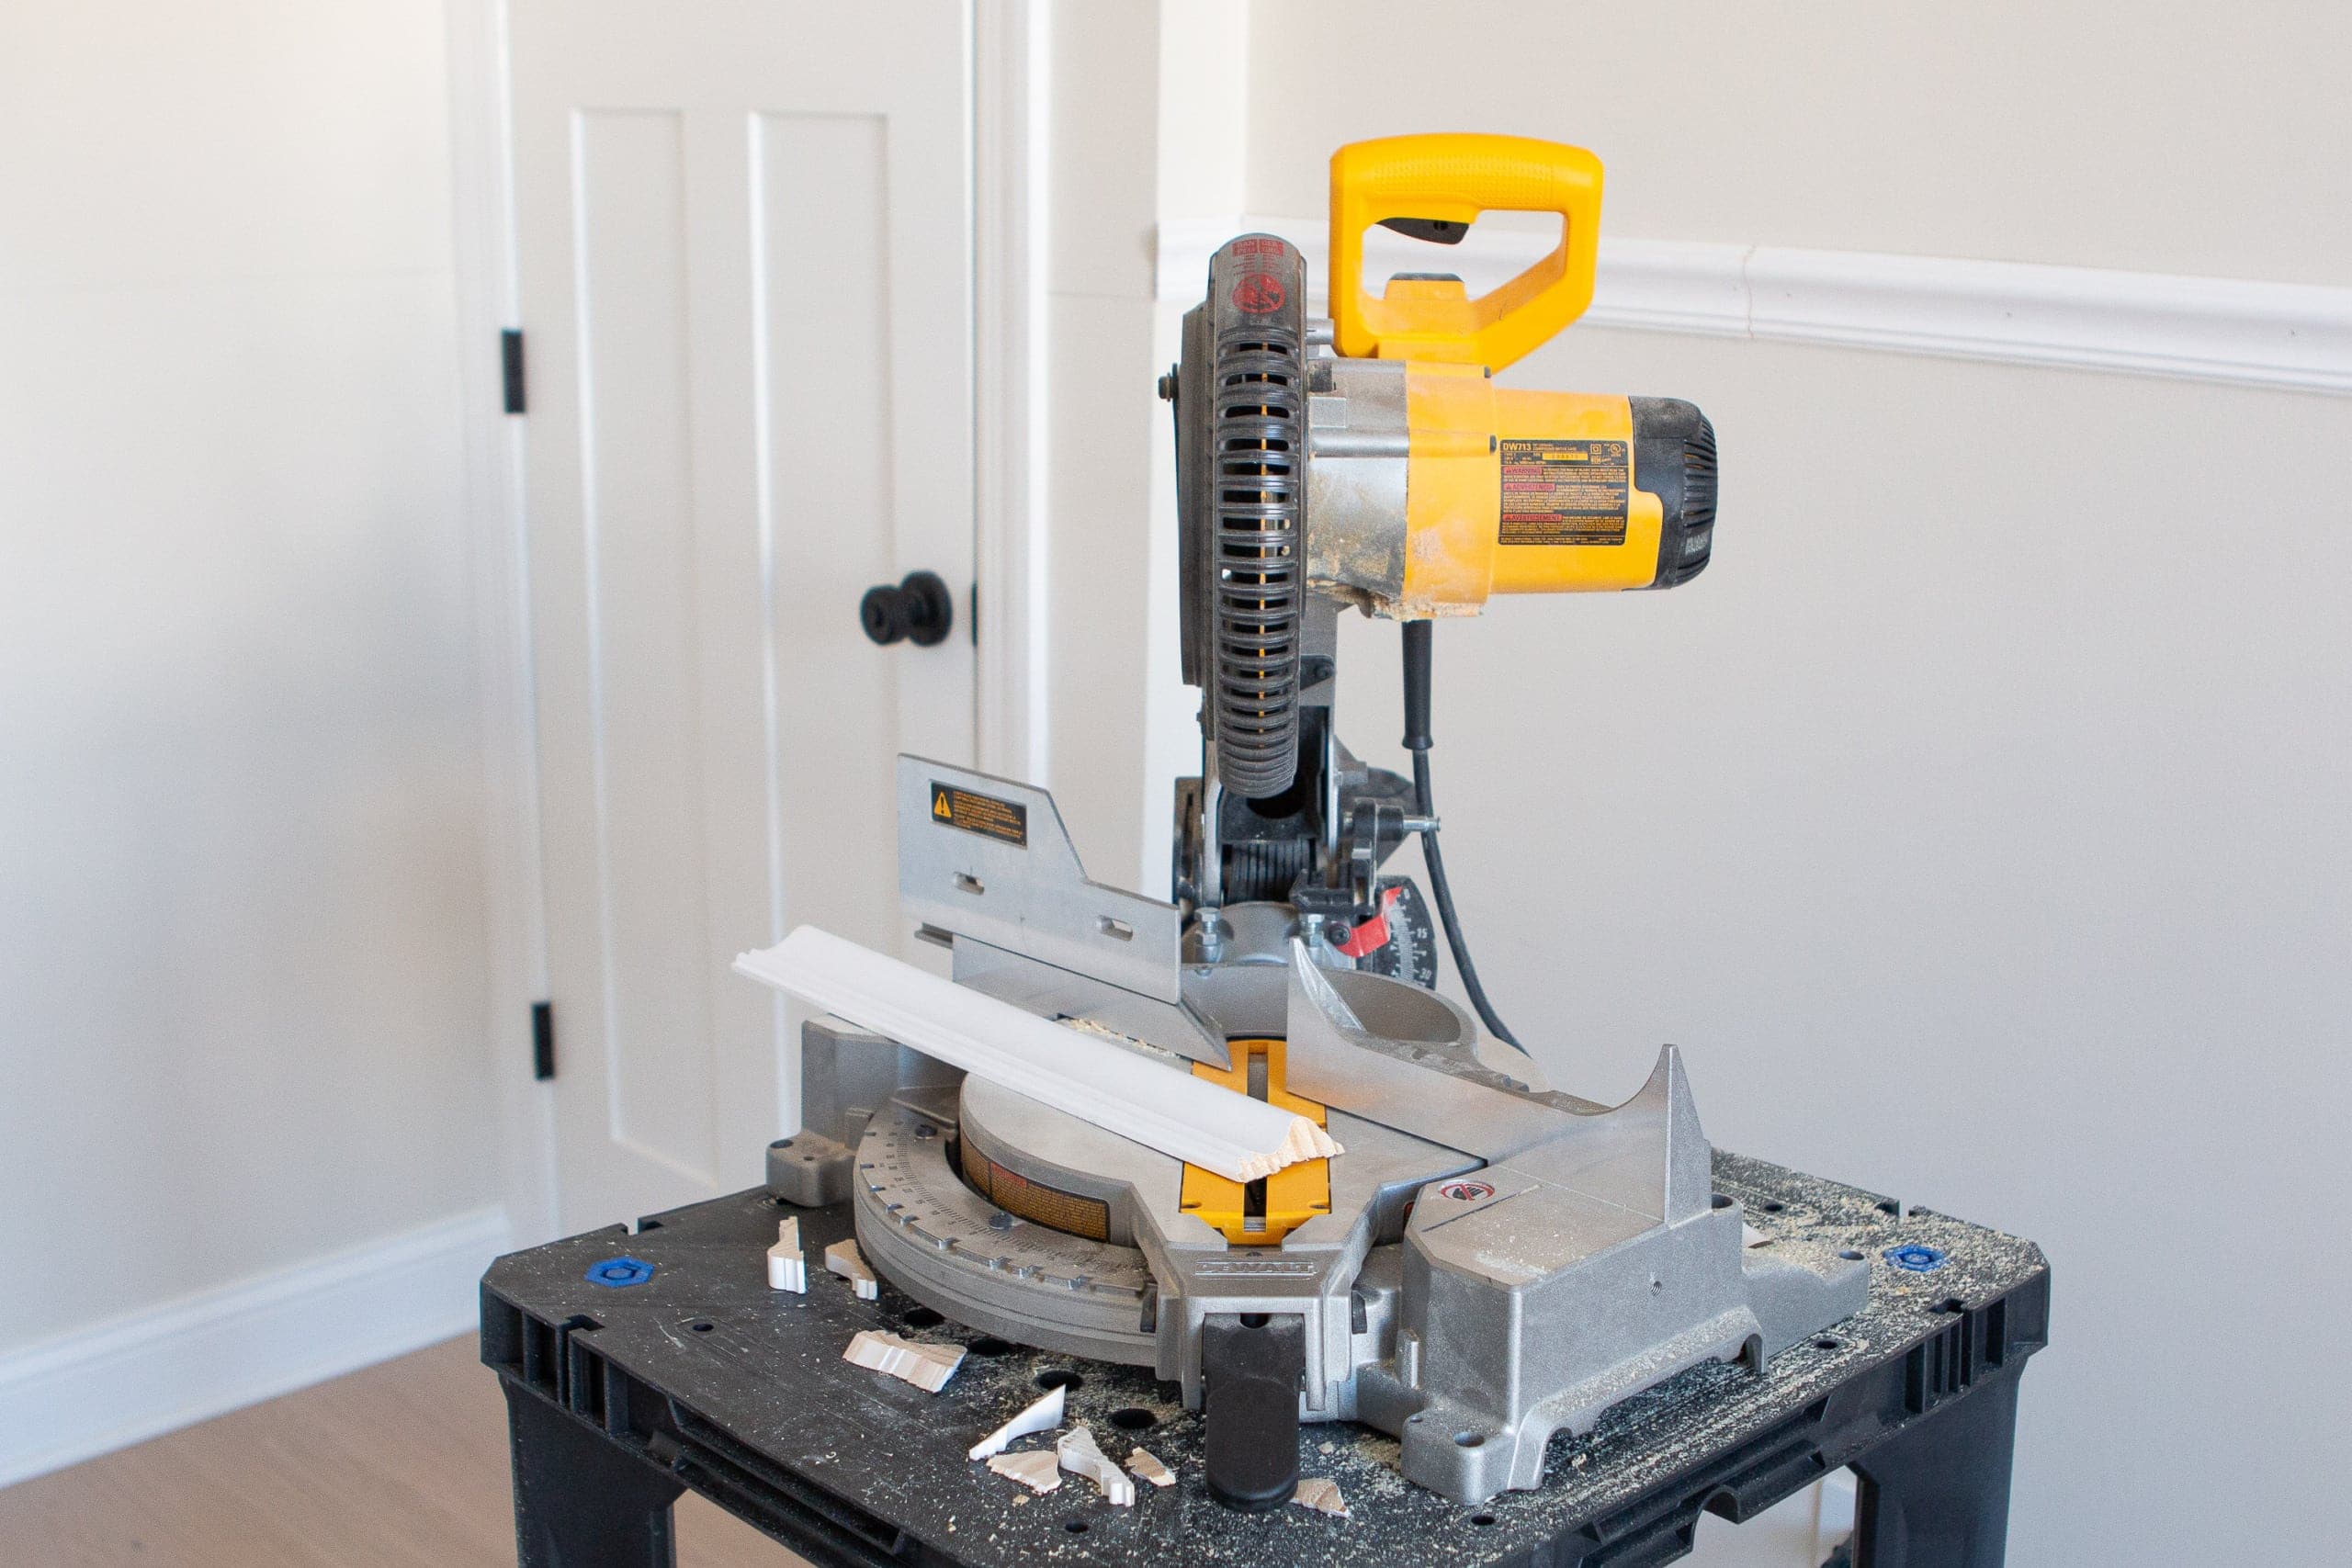
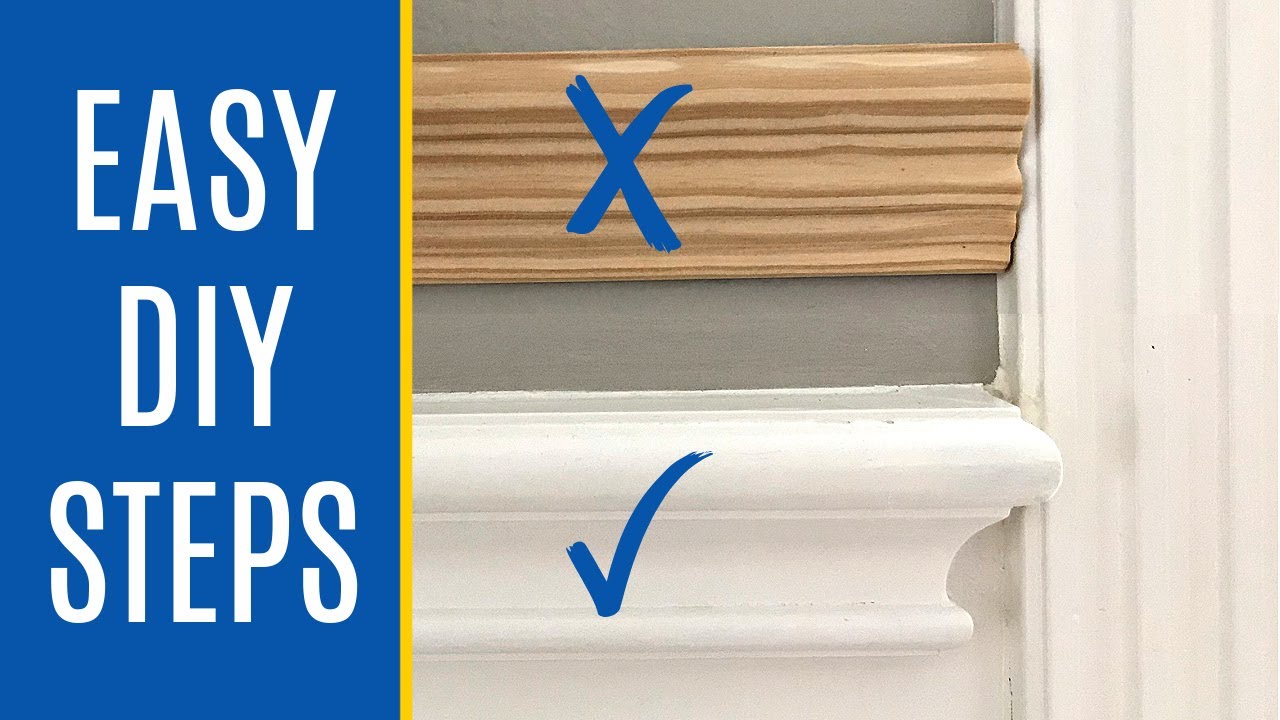
How to cut an end cap for molding, like chair rail. Crown corners can be cut using a miter saw or purchased preassembled. How to cut inside corners of chair rail trim. I then go to the jointer to flatten material and create a 90 degree edge. How to cope a chair rail. Turn the miter to the same angle on the other side of the platform, and cut the second corner piece in. The preassembled inside and outside corner pieces simplify the installation. The 45 degree cut on the return will abut the chair rail, and the 90 degree cut will sit flush with the wall (or in this case, the side of my bookcase. How to cut chair rails at angles. Cut chair rail with coping saw. In my opinion this is the best looking option when installing chair rail trim. You want to trim the filler for the end cap on molding along the corner or back edge of the 45. Chair rail is the most misused and abused molding in new houses today.
Place the chair rail along the wall and pencil mark where the outside corner should be mitered. How to cut chair rails at angles. Chair rail is a type of profiled molding often used as a type of border or trim above the stairs or at the top of wainscoting that runs up stairs. Outside corners are miter cuts which means you must measure the angle and miter the right degree so the 2 pieces of chair rail meet and fit seamlessly. Create a panel effect with this popular decorative trim moulding.
How To Cut An End Cap For Molding Like Chair Rail Abbotts At Home from i.ytimg.com Watch as the #verycoolguys of construction show you how to install chair rail, in a proper molding installation.today we show you, step by step, how to insta. Once you have cut one corner end of the rail, cut the corner as well. Put trim around your door, and then but the chair rail into the door trim. The cuts will be the same. Cut chair rail and nail directly into the wall studs measure and cut chair rail. This also shows end grain. Set your miter at the correct angle. Installing chair rail molding on an angled cut so it will fit in a corner sounds like a complicated task, but it really isn't.
Trick the eye with paint.
How to cut chair rails at angles. Outside miter cuts are used to join two pieces of chair rail that meet at an outside wall corner. Measure the length of the chair. Measure and cut any miters for the chair rail, especially if you are turning any corners that are not 90º. Cut at the marked position at 45 degrees. Installing chair rail molding on an angled cut so it will fit in a corner sounds like a complicated task, but it really isn't. An outside corner is much more simple than wanting to conquer an inside cut or cope. The 45 degree cut on the return will abut the chair rail, and the 90 degree cut will sit flush with the wall (or in this case, the side of my bookcase. Chair rails are often installed for decorative purposes. Chair rail is a type of molding. Measure and mark the place where you will cut, and position the rail with its plane face touching the back of the miter box. Ripping cherry to rough width. If one is mitering inside corners the lengths of the moulding must be perfect but with a cope a slightly long length can be snapped in rather than.
Measure and cut any miters for the chair rail, especially if you are turning any corners that are not 90º. How to cut an end cap for molding, like chair rail. **** for lead time & ordering fill out this page & print, email to neil@cornerblockstore.com with state shipping to. If it sticks up above the door trim any, miter the end a little. Watch as the #verycoolguys of construction show you how to install chair rail, in a proper molding installation.today we show you, step by step, how to insta.
Install A Chair Rail How Tos Diy from diy.sndimg.com The 2170a and 2170a.1 are both excellent choices for all types of offices where chairs and furniture mar the walls. High impact clear rub rail provide protection while allowing wall color to show through. This easy diy puts a pretty end where molding meets doors or windows or ends on a wall. Cut the chair rail molding to length, mitering the end at 45° outside corner miter. The 45 degree cut on the return will abut the chair rail, and the 90 degree cut will sit flush with the wall (or in this case, the side of my bookcase. The cuts will be the same. Chair rail molding is place on a wall about the height of a chair back and was originally designed to protect the wall from that chair back. You want to trim the filler for the end cap on molding along the corner or back edge of the 45.
How to cut chair rails at angles.
Measure the length of the chair. In my opinion this is the best looking option when installing chair rail trim. Otherwise, cut a piece of chair rail about an inch long and mitered, then miter the end of the longer piece and glue them together to make a return. Cutting the other end of rail. If a wall is longer then the length of a single piece of molding, two pieces should be mitered together. Outside miter cuts are used to join two pieces of chair rail that meet at an outside wall corner. High impact clear rub rail provide protection while allowing wall color to show through. Measure and cut any miters for the chair rail, especially if you are turning any corners that are not 90º. The 2170a and 2170a.1 are both excellent choices for all types of offices where chairs and furniture mar the walls. Ripping cherry to rough width. Emphasize the curved cut you'll make with a pencil. It is used as an aesthetic addition to a room, or as a functional piece of woodwork that stops chairs from sliding into the wall. Bevel, miter, or make scarf joints as required using the techniques demonstrated earlier.